Your school’s logo. Your team colors. Your mascot. These are all part of what makes your athletic program unique. Custom graphics give you a way to bring that identity into your athletic facilities. From windscreens and field wall padding to football goal post pads, scoreboard I-beam pads, and sideline accessories, custom graphics can help create a consistent look across your sports venues.
But getting the finished product right takes more than sending over a logo and picking a color. You need to choose the right products, prepare your artwork, plan the design, and allow enough time for reviews and production. Whether you’re branding a new athletic complex, updating an existing field, or adding school graphics to individual pieces of equipment, a little planning can make the process easier.
Here are eight steps to help you plan your custom athletic facility graphics project.
1. Decide Where You Want to Add Custom Graphics
Before thinking about logos and colors, take a look at your athletic facilities. Where would custom graphics make the biggest impact? You might want to update one field, add branding to your gym, or create a consistent look across several sports venues.
Start by identifying the products you want to customize. Sportsfield Specialties offers custom graphics on several types of athletic facility products.
Windscreens
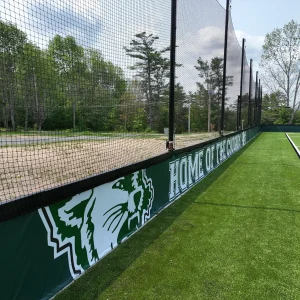
Windscreens are a great place to display school logos, team names, mascots, and sponsor graphics. They can add school branding to baseball and softball fields, tennis courts, and other outdoor athletic areas.
Field Wall Padding
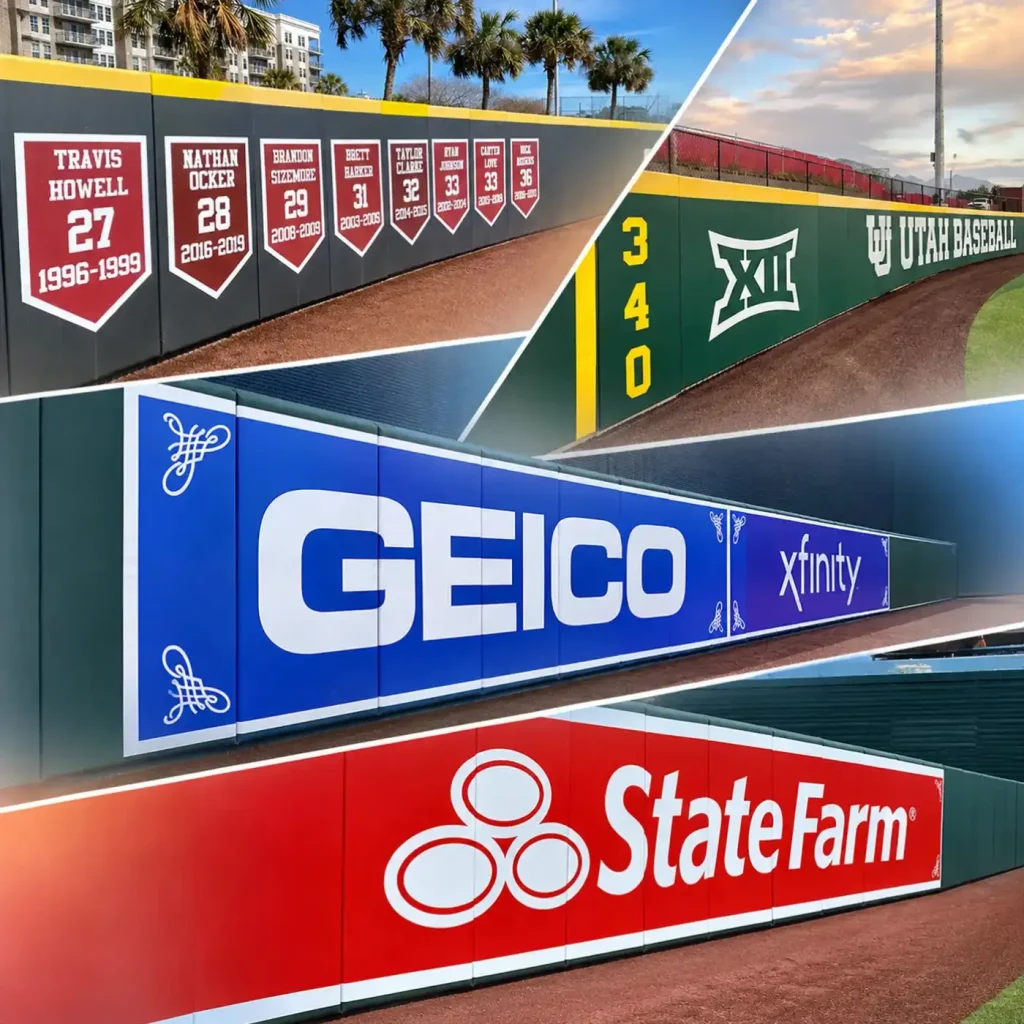
Custom field wall padding can turn an outfield wall or other padded field perimeter into a large display area for your school’s branding. Add logos, lettering, and team colors while providing impact protection for players.
Football Goal Post Pads
Goal post pads offer a visible place to display your school logo, mascot, or team name. Custom graphics can help your goal posts match the rest of your football field branding.
Scoreboard I-Beam Pads
Don’t overlook the exposed structural supports around your scoreboard. Custom scoreboard I-beam pads can add school colors and graphics to these areas while providing padding around the supports.
Indoor Wall Padding
Bring your school’s identity into the gym with custom indoor wall padding. Display team logos, mascots, school names, and other graphics while adding protection to indoor athletic spaces.
Sideline Yardage Markers
Custom sideline yardage markers are another way to carry your team’s branding onto the football field. Add logos and graphics to coordinate with your other football field accessories.
End Zone Pylons
End zone pylons may be smaller than other customized products, but they are another opportunity to display your school’s identity. Custom graphics can help tie together the look of your football field.
When choosing products, think about how they will look together. Matching graphics across windscreens, padding, and field accessories can help create a more complete and professional appearance.
You don’t have to customize everything at once. Start with the products that matter most to your facility and build from there.
2. Gather Your Logos, Artwork, and Other Design Elements
Once you’ve decided which products you want to customize, start gathering your artwork. Having the right files ready can help prevent delays and make the design process easier.
Start with these items:
- Primary school logo: Use the official logo approved by your school or organization.
- Secondary logos: Gather alternate logos, mascots, athletic department marks, and other approved designs.
- Team names and lettering: Decide whether you want to include school names, team names, slogans, or other text.
- Sponsor logos: If you plan to include sponsors, collect their approved artwork and confirm you have permission to use it.
- Existing designs: If you want new products to match graphics already installed at your facility, provide photos or examples of those products.
Try to get the original artwork files rather than downloading logos from a website or taking screenshots. A logo may look sharp on your computer but become blurry when enlarged for a large windscreen or wall pad. Starting with the original artwork gives the graphics team a better file to work with.
It’s also important to use the correct version of your logo. Schools sometimes have several versions of their branding, including older logos, alternate mascots, and different athletic department marks. Check with your school’s marketing department or athletic director if you’re unsure which version to use.
3. Identify Your Official School and Team Colors
Getting your colors right is an important part of any custom graphics project. A school’s official colors help tie its athletic facilities together. But choosing the right shade can be more complicated than it sounds.
The blue on your school’s website, for example, may not look exactly like the blue printed on your windscreens or wall padding.
Before starting the design, find out if your school has official brand guidelines. These may include specific color values for logos, lettering, backgrounds, and other design elements.
Some common color specifications include:
- Pantone (PMS): A standardized color matching system often used for brand colors.
- CMYK: A four-color printing process used in many print applications.
- RGB: A color format used for digital screens and displays.
If your school doesn’t have official color specifications, provide examples of the colors you want to match. You should also consider the material being printed. Vinyl, mesh, and other materials can affect how a color looks in the finished product.
One important tip: Don’t approve a color based on your computer screen alone.
Screens and printers display colors differently. When an exact match matters, ask about physical material samples, ink samples, or digital print samples.
Sportsfield Specialties provides product color charts to help customers explore available colors. Keep in mind that the charts are a starting point, not a guarantee of the exact finished color.
4. Prepare Your Artwork Files for Printing
Now it’s time to make sure your artwork is ready for production. The quality of your original files can have a big impact on the finished graphics. This is especially important when printing large logos or detailed designs on windscreens and wall padding.
Whenever possible, provide vector artwork. Vector files use lines, shapes, and paths rather than individual pixels. This allows the artwork to be enlarged or reduced without losing image quality.
Common vector file formats include:
- AI (Adobe Illustrator)
- EPS
- SVG
- Vector PDF
- CDR (CorelDRAW)
High-resolution raster files may also be accepted, depending on the artwork and project. These include PNG, TIFF, PSD, and JPG files. Unlike vector files, raster images are made up of pixels. If a small image is enlarged too much, it can become blurry or look pixelated.
A few more things to keep in mind:
- Send original artwork files whenever possible.
- Avoid screenshots and low-resolution images copied from websites.
- Include fonts or convert text to outlines when required.
- Make sure all logos and images are the correct versions.
- Keep important text and design elements clear and readable.
- Include notes about how you want the artwork positioned.
Not sure if your files are suitable? Send them to your graphics representative for review before moving forward. It’s much easier to address artwork problems early than to discover them after the design process has started.
5. Think About the Design and How It Will Look on Each Product
A design that looks great on a computer screen may need some adjustments to work on an actual product. Every product has different dimensions, shapes, and available graphic areas. A large windscreen provides much more room for artwork than a football goal post pad or end zone pylon.
Think about how people will see the finished graphics and what you want them to notice.
Here are a few questions to consider:
- Should the school logo be the main focus?
- Do you want to include a mascot, team name, or slogan?
- Will the design include sponsor logos?
- Should the background use a solid team color or a more detailed design?
- Do you want the same design across multiple products?
- Will people view the graphics up close or from the stands?
Keep viewing distance in mind.
A large logo or simple design may be easier to recognize from across a football field than small lettering or detailed artwork.
Also, think about how the design will fit the product. A graphic may need to be resized, repositioned, or simplified to work on a smaller surface.
If you’re customizing several products, look at the project as a whole. You want the graphics to work together without making every product look exactly the same.
Consistent colors, logos, and design elements can help create a unified appearance throughout your facility.
6. Review Your Artwork Proof Before Approving It
Before your custom graphics go into production, you’ll have an opportunity to review an artwork proof. A proof shows how the proposed design is expected to look on the finished product. It’s your chance to check the details and request changes before production begins.
Take your time with this step. Don’t assume everything is correct just because the design looks good at first glance.
Review the following:
Logos and artwork
- Are the correct logos being used?
- Are they the right size?
- Are they positioned correctly?
- Are any important parts of the artwork missing or covered?
Colors
- Do the colors match your approved specifications?
- Are the background and lettering colors correct?
- Do the colors work well together?
Text and lettering
- Are school names and team names spelled correctly?
- Are slogans and other wording accurate?
- Is the lettering large enough to read?
Product layout
- Does the design fit the product’s actual dimensions?
- Are the graphics positioned where you want them?
- Will the design look right when installed?
Consistency
- Do the products use the correct logos and colors?
- Do the designs work together across the facility?
- Are sponsor logos and other graphics consistent?
If you’re ordering several customized products, review each proof individually. A design that works well on a windscreen may not work as well on a goal post pad or scoreboard I-beam pad.
It’s also a good idea to involve the people responsible for approving school branding. This may include your athletic director, school administrator, marketing department, or other decision-makers.
Most importantly, make sure everyone is satisfied before giving final approval. Changes become much more difficult once production has started.
7. Plan Ahead for Artwork Approval and Production
One of the easiest ways to delay a custom graphics project is to wait too long to get started. Even if you already have your logos and colors, the project still needs time for artwork preparation, proof reviews, revisions, approval, production, and delivery.
A typical project may involve:
- Artwork submission: You provide your logos, graphics, color information, and product details.
- Artwork review: Your supplier reviews the files and determines whether they are suitable for the project.
- Initial proof: A design is prepared for you to review.
- Revisions: Changes are made based on your feedback.
- Final approval: You approve the artwork before production begins.
- Production: Your customized products are manufactured.
- Delivery: The finished products are shipped according to the project schedule.
The amount of time needed can vary depending on the products, project size, artwork requirements, and number of revisions. If you’re planning to have custom graphics ready for the start of a sports season, a tournament, or a facility opening, don’t wait until the last minute.
Start the conversation early and ask us about current production and delivery timelines.
Also, make sure the people responsible for reviewing and approving the artwork are available. Waiting for feedback or final approval can hold up the entire project.
8. Communicate With Our Sales Team and Keep Your Project Organized
Good communication helps keep a custom graphics project moving. Before placing your order, make sure you, our sales team and graphic designers agree on the important details.
These include:
- Which products are being customized.
- Product sizes, quantities, and configurations.
- Which logos and graphics will be used.
- The colors and design elements you want.
- Artwork requirements and submission deadlines.
- Who will review and approve the proofs.
- Expected production and delivery schedules.
If you’re ordering several products, keep all the information in one place. A simple project checklist can help you track artwork submissions, design revisions, approvals, and delivery dates.
Don’t hesitate to ask questions if you’re unsure about an artwork requirement or design detail. Addressing questions early can help prevent problems later.
Bring Your Athletic Facility Branding Together With Custom Graphics
Custom graphics can help transform athletic equipment into a more recognizable part of your school’s identity. From large-scale windscreens and field wall padding to goal post pads, scoreboard I-beam pads, indoor wall padding, sideline yardage markers, and end zone pylons, there are many ways to display your school’s logo, mascot, and team colors.
The key to a successful project is planning ahead. Choose the right products, gather your artwork, confirm your colors, and take the time to review your designs before production begins.
Sportsfield Specialties offers a variety of athletic facility products with custom digital graphics and lettering options. Whether you’re updating one field or coordinating graphics across an entire athletic complex, our team can help you explore the available products and customization options.
Ready to start planning your custom graphics project? Contact Sportsfield Specialties to discuss your project and find out how to get started.